Customizing Your Store - Section II: Advanced Design
 |
NOTE: The modifications you make to your store in this Chapter involve editing the basic files that run your store. You should ALWAYS make a backup copy of any file before changing it in any way. |
2.1 Changing Fonts, Colors, and Styles
Many design elements of your store such as fonts, colors, and layout are set in a Cascading Style Sheet, which is a file that keeps track of HTML design styles and automatically applies them to the pages of your store. Instead of having to change the design of every page in your store, you simply make a change once in the Style Sheet, and that modification "cascades" through your site to every page.
For example, the Style below sets the regular body text to black 12-pixel high sans-serif type on a white background with flush left margins:
The Cascading Style Sheet for your store is located on your website at www.mystore.com/templates/templatename/stylesheet.css (where templatename is the name of your default template, such as cre63_ats.) To edit the Style Sheet, open it in an HTML editor (such as Dreamweaver). Because the Style Sheet is written in HTML (the standard computer code used to create webpages), it will certainly help to know HTML or at least to have a reference guide handy if you want to edit the Style Sheet yourself.
Depending on how complex your website design is, your Style Sheet can define hundreds of styles. You may just have a single style defining your text, as in the example above -- but there may be other styles creating different styles for different kinds of text. For instance, there may also be a style defining the text style for tables, or for Infobox headers. If you change the style for Body Text, these other styles may not automatically change, even though they all look the same initially and you might think they are all the same kind of element.
 |
TIP: If you want to change every similar element -- for instance, make ALL black text red -- you can use your HTML editor’s Search and Replace feature |
Fonts
Web browsers do not download fonts to a user's computer, but use the fonts that are already on the computer. For this reason, the Cascading Style Sheet defines fonts in families. In the example above, the font family instructs the web browser to use the Tahoma font when displaying the web page -- but if this font is not available on the user’s computer, it will use Verdana instead, or Arial if Verdana is not available, and as a last resort, any font that is described as "sans serif."
Because of this, you should not make your design dependent upon unusual or specialty fonts that your customers are not likely to have on their computers. Not only will your customers not see that font, but the substituted font could drastically upset the way your site appears on their screen. If it is absolutely necessary to use specialty fonts in your design -- for your logo, for instance, or for links, etc. -- you should use Photoshop or a similar graphics program to create a graphic of that element instead.
Colors
Colors are specified by their HTML code. In the Body Text style example above, the background color is set to #ffffff, which is the code for white; the text color is specified as #000000. If you wanted a green background instead, you would simply change that code to #009900.
A reference chart of HTML color codes can be found at http://www.wdvl.com/Graphics/Colour/666.html, or you can search the Internet for "html color code."
Note that if you are using a template that has rounded corners on the Infoboxes and you change the background color, the Infoboxes will show square corners in the original background color:
This is because the rounded corners are actually images that display on top of your background. To get rid of these square corners, you will need to edit the background color of these images in Photoshop or a similar graphics program.
The images are located in folder named www.mystore.com/templates/templatename/images/infobox/.
Open the files corner_right.gif, corner_left.gif, and corner_right_left.gif and change the background color to match your new background color. Make sure to use the HTML color code to ensure an exact match.
2.2 Displaying a Background Image
Instead of using a solid color for your background, you can use a pattern or an image to make your site more visually dynamic. Large images, such as a single photo, will take a long time to load, and so should be avoided. The best method for creating a background image is to use a small repeating square pattern called a "tile" -- the browser will automatically use this one tile over and over to create a complete, seamless background. The smaller and simpler the tile, the more quickly it will load.
You must create the tile in a graphics program such as Photoshop. Make sure it is perfectly square.
Save the image with a name such as mypattern.gif.
Upload the image to your website's www.mystore.com/templates/templatename/images/ directory.
Open your Cascading Style Sheet and find the style called BODY.
Change the entry background: #ffffff to background-image: www.mystore.com/templates/templatename/images/mypattern.gif
2.3 Customizing Buttons
CRE Loaded comes with graphic images of different buttons that you can use on your site:![]()
![]()
If you change the colors of your site, you may want to change the colors of the buttons as well. You can edit buttons in Photoshop or any similar graphics program. Be sure to keep the size exactly the same and to save your edited button with the same filename and extension as the original.
The buttons are located in www.mystore.com/templates/templatename/images/buttons/language/.
2.4 Installing a New Template
CRE Loaded 6.4 comes with one default template pre-installed. If you do not wish to use the default template you can buy pre-made or custom templates from CRE Loaded and our partners. 6.2 (an older version of CRE Loaded) offered 4 pre-installed templates for you to select from. You cannot use a custom 6. 2 template with a 6.4 store. In most cases you will need to upgrade to a template to match the version of software you are using.
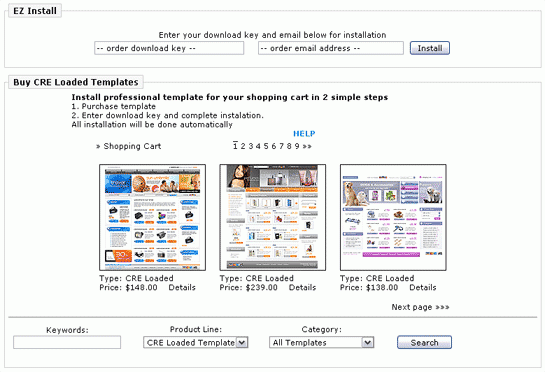
At the bottom of your Admin => Design Controls menu, you can purchase templates from CRE Loaded and have them installed automatically.
If you wish to purchase a template from another source, installing the new template is still very easy. After you download the new template files to your computer:
-
Make a new folder with the name of the new template: mydocuments/mystore/templates/newtemplate/
-
Unzip the new template files to this folder.
-
Using your FTP program, upload the /newtemplate/ folder to the /templates/ directory of your website.
-
In your Admin => Design Controls => Template Manager menu, select "Insert."
-
Enter the name of your new template. You can also add a "thumbnail" image for the template if you want; this image will only show up here in the Template Manager (to help you remember what each template looks like), so it is not necessary. Click "Save" when you are done.
-
In the Template Manager, select your new template and click "Edit."
-
Select "Set as Site Default" and configure the template (see Section 1.1). Click "Save" when you are done, and your site will now appear with the theme of your new template.
2.5 Customizing a Template
All of the templates that come pre-installed with your CRE Loaded store have a variety of extra elements that you can swap out to customize the look of your store. These images are stored in the images/ and images/infobox/ directories for each template. These extra elements range from 4 rounded infobox corners for the Original template to backgrounds, decorative images, arrows, and several alternate logos and header and footer bar and navigation menu elements.
To use any of these alternate elements, find the alternate file and rename it with the name of the default element. (You may need to click Refresh or Reload in your browser before the changes are visible.)
 |
NOTE: Always save a backup of any element you edit or rename in case you ever want to change back to the default. It is also a good idea to have backups in case anything goes wrong with your modifications. |
If none of the alternate elements suits your taste, or you want to fully customize your store, you can edit any of the individual elements of your template in Photoshop or a similar graphics editing program. (This process is recommended only to advanced users!)

