Forms & Surveys
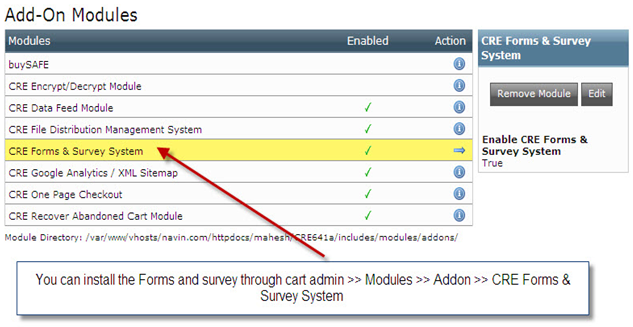
Forms and survey is the module, which you can use to create your dynamic HTML form/surveys. You can install the form module through cart admin >> Modules >> Add on >> CRE Forms & Survey System, refer to the below image for more detail:
Once you install it, you will see an additional menu in your left navigation infobox in the admin as shown below:
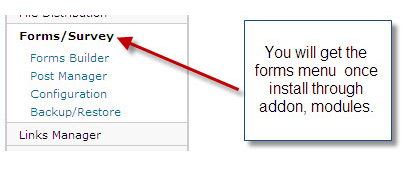
You will get 4 menu options in your form/surveys:
- Forms Builder
- Post Manager
- Configuration
- Backup / Restore
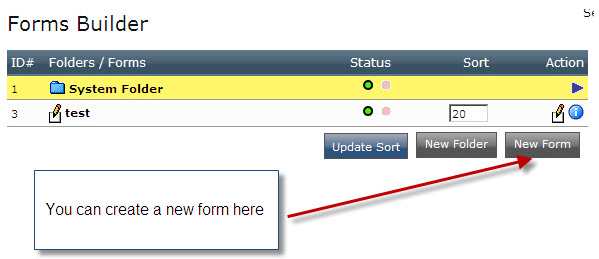
Forms Builder : This is the main section of the form builder where you can create your new form, edit them and update your question sets. To create a new form you need to click on the Forms Builder >> New Form button
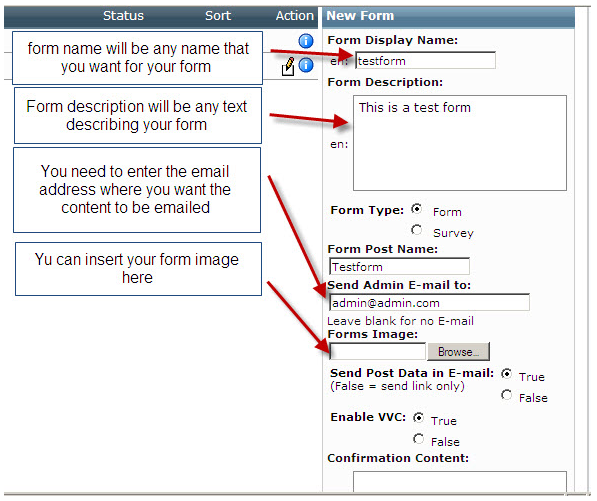
Once you click on the button you will be redirected to the actual form creation page and get the following options to be completed in order to create a form.
1. Form Display Name: This will be the name of your form.
2. Form Description: Here you can update your form description.
3. Form Type: You can select the form you want Forms/Surveys.
4. Form Post Name: This will be you form POST name.
5. Send Admin E-mail to: Update the email address where the form will email you back.
6. Forms Image: You can upload image for your form.
7. Send Post Data in E-mail: If you want your Form POST data to be emailed, then select this option.
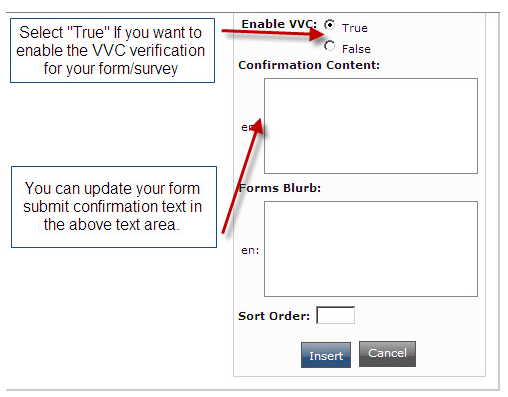
8. Enable VVC: This will display the VVC (Captcha) Image on your form.
9. Confirmation Content: This will show the Confirmation text after submitting the form.
10. Forms Blurb: Your form Blurb.
11. Sort Order: You can add sort order for your forms.
You can refer to the below image for form build page details:
Once you create the form it will be listed under "Forms Builder" section, with 2 edit options at the start and at the end of the form name, as shown in the below image:
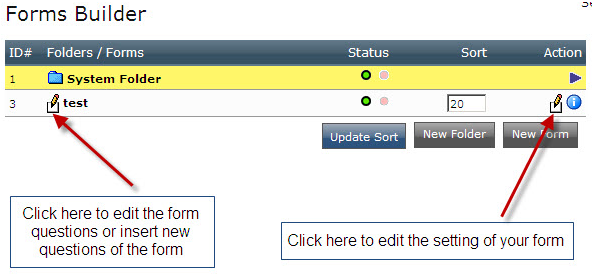
The first edit option is to edit your questions of the form and the second edit option will offer you to edit the form setting that you entered while creating the form. To add your form questions (Form Fields), click on the first edit icon, this will take you to the form question edit/insert page.
You will get New questions and Special New question on the question insert page.
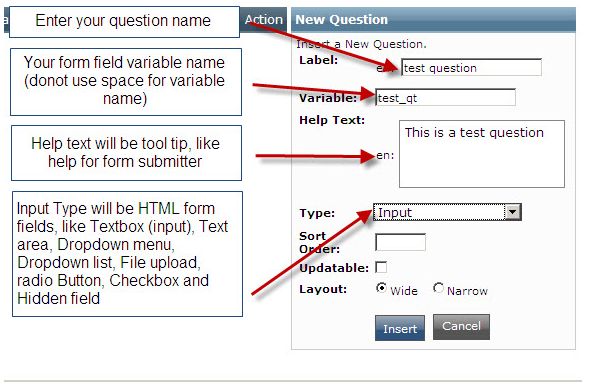
New Question : here you can create normal HTML Form Fields, refer to the below image for details:
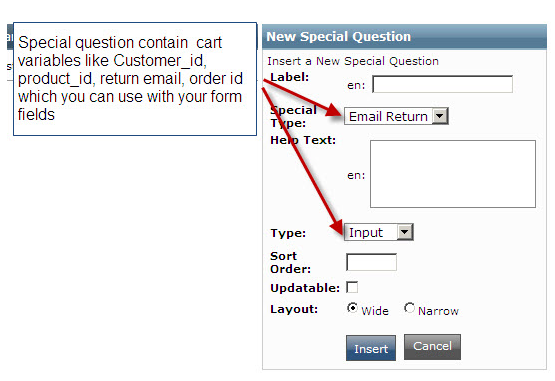
Special new question : This is quite similar to the New Question, except here you can integrate the cart variables with your form fields, as shown in the below image:
You will also get the other options on the form question edit page like:
1. Edit
2. Purge
3. Copy to
4. Move to
5. Edit Value
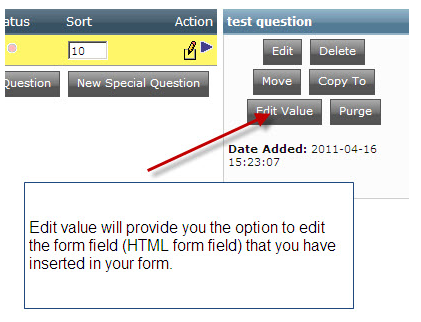
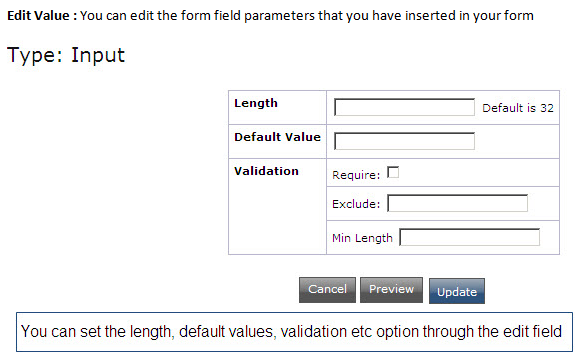
Edit Value : You can edit the form field parameters that you have inserted in your form
Post Manager: Post manager is the second option in your Form Surveys menu. Here you can manage the Post data that you get from your form. You can view or purge the post data.
FSS Configuration: Here you can configure your base form values as defined below:
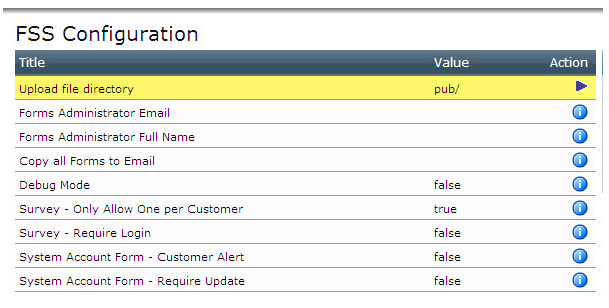
1. Upload File Directory : This is the directory where you file upload form will upload the uploaded files.
2. Forms Administrator Email: Here you can submit your email address, where you want the form data to be emailed or updated.
3. Forms Administrator Full Name: Here you can update the admin name.
4. Copy all Forms to email: This will send all admin notices to this email as well as the email specified on each form.
5. Debug Mode: You can enable debugging here.
6. Survey -Only allow One per Customer : Only allow one survey per customer.
7. Survey - Require login: Require login for survey.
8. System Account Form - Customer Alert: Display a message in the top of the checkout and account pages, when there are new fields in their My Account System form that they have not filled out.
9. System account Form - Require Update: Redirect a customer during checkout to the My Account -> System Form page to update additional or unanswered questions there during checkout.
Backup/Restore : This option is to create the backup of your form data. You can also restore the backup data using the same option.
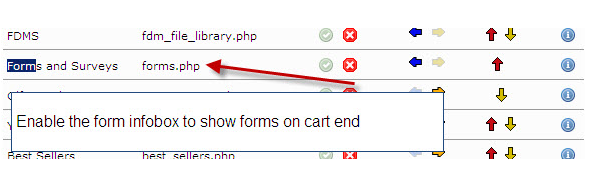
Once you complete the form setup you need to enable the forms infobox through your cart admin >> Design Control >> Infobox manager >> Forms and Surveys, edit it and enable.
Information
Articles
